Videos
This guide provides a comprehensive overview of how to add, configure, and manage videos using the ParOne platform. Whether you’re uploading videos directly, importing from popular platforms like YouTube or Frame.io, or setting up advanced features like custom actions and eCommerce integrations, this page walks you through each step with detailed instructions and visual aids.
Adding Videos
Click on “Videos” in the sidebar, and click “Add Video” in top right part of the screen.
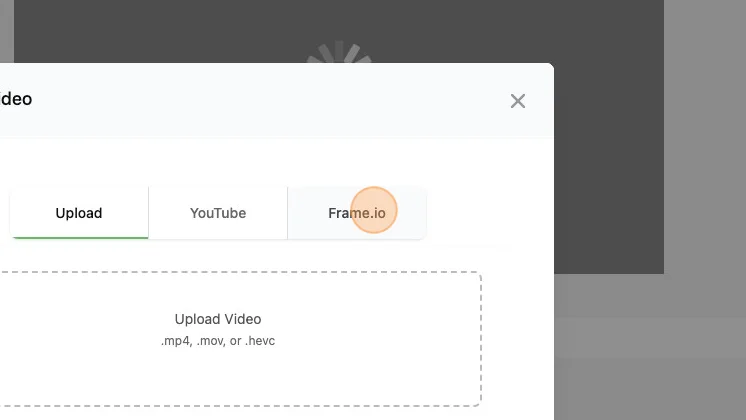
Uploading
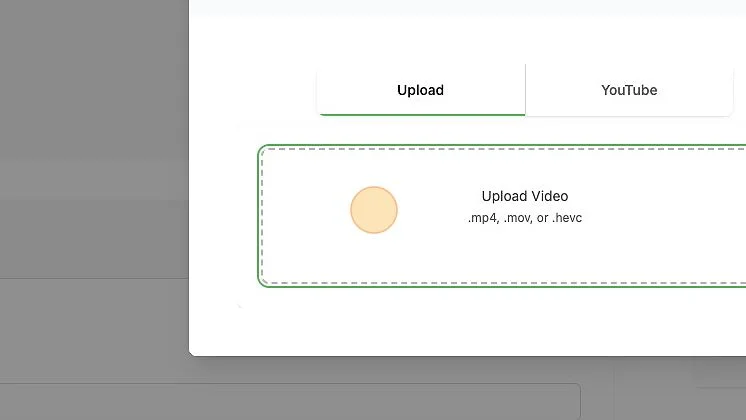
Click the “Upload Video” button. ParOne accepts .mp4, .mov and .hevc files. You can upload multiple files, but will need to begin uploading each video one by one.
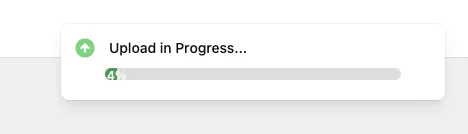
You will see a notification in the top right part of your screen with the upload progress. Do not close the browser window until this is complete.
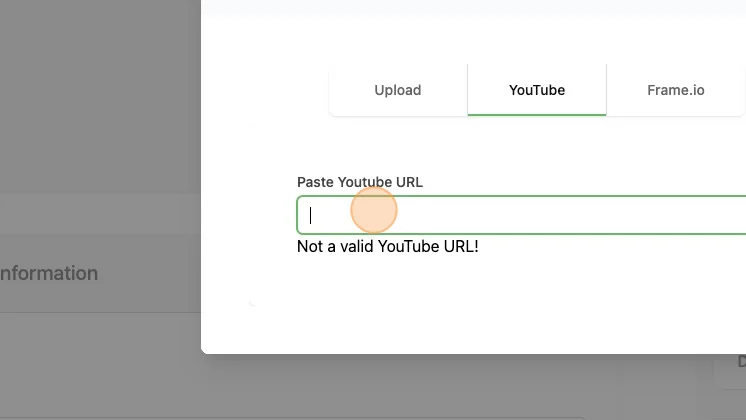
YouTube Import
Instead of directly uploading a video, you can opt to upload a video directly from YouTube. The YouTube can be unlisted.
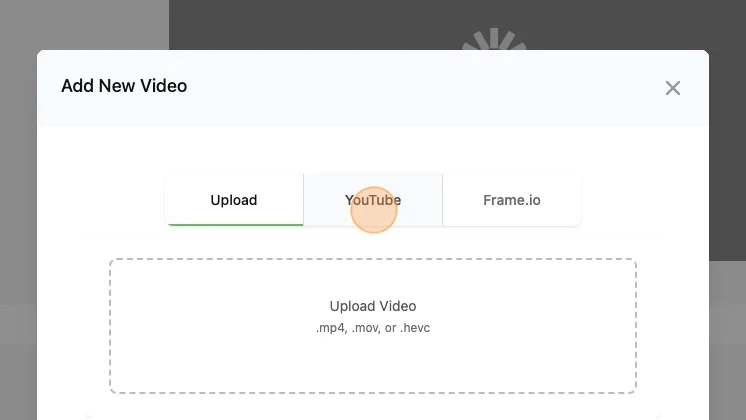
Select the YouTube tab. Insert the link. The Link must match the structure of https://www.youtube.com/watch?v={YOUTUBE VIDEO ID}, and must have processed all resolutions (360p,720p,1080p) prior to uploading. Upon a successful insertion of a link, the process will begin.
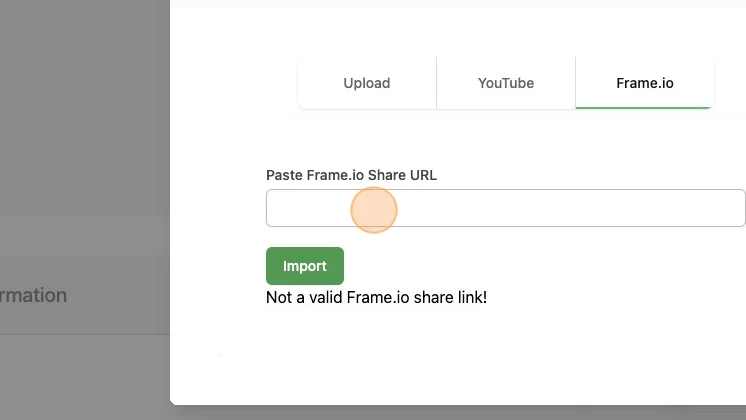
Frame.io Presentation Requires Frame.io
Instead of directly uploading a video, you can opt to link a Frame.io presentation.
Select the Frame.io tab. Insert the link and Import. The link must begin with https://f.io
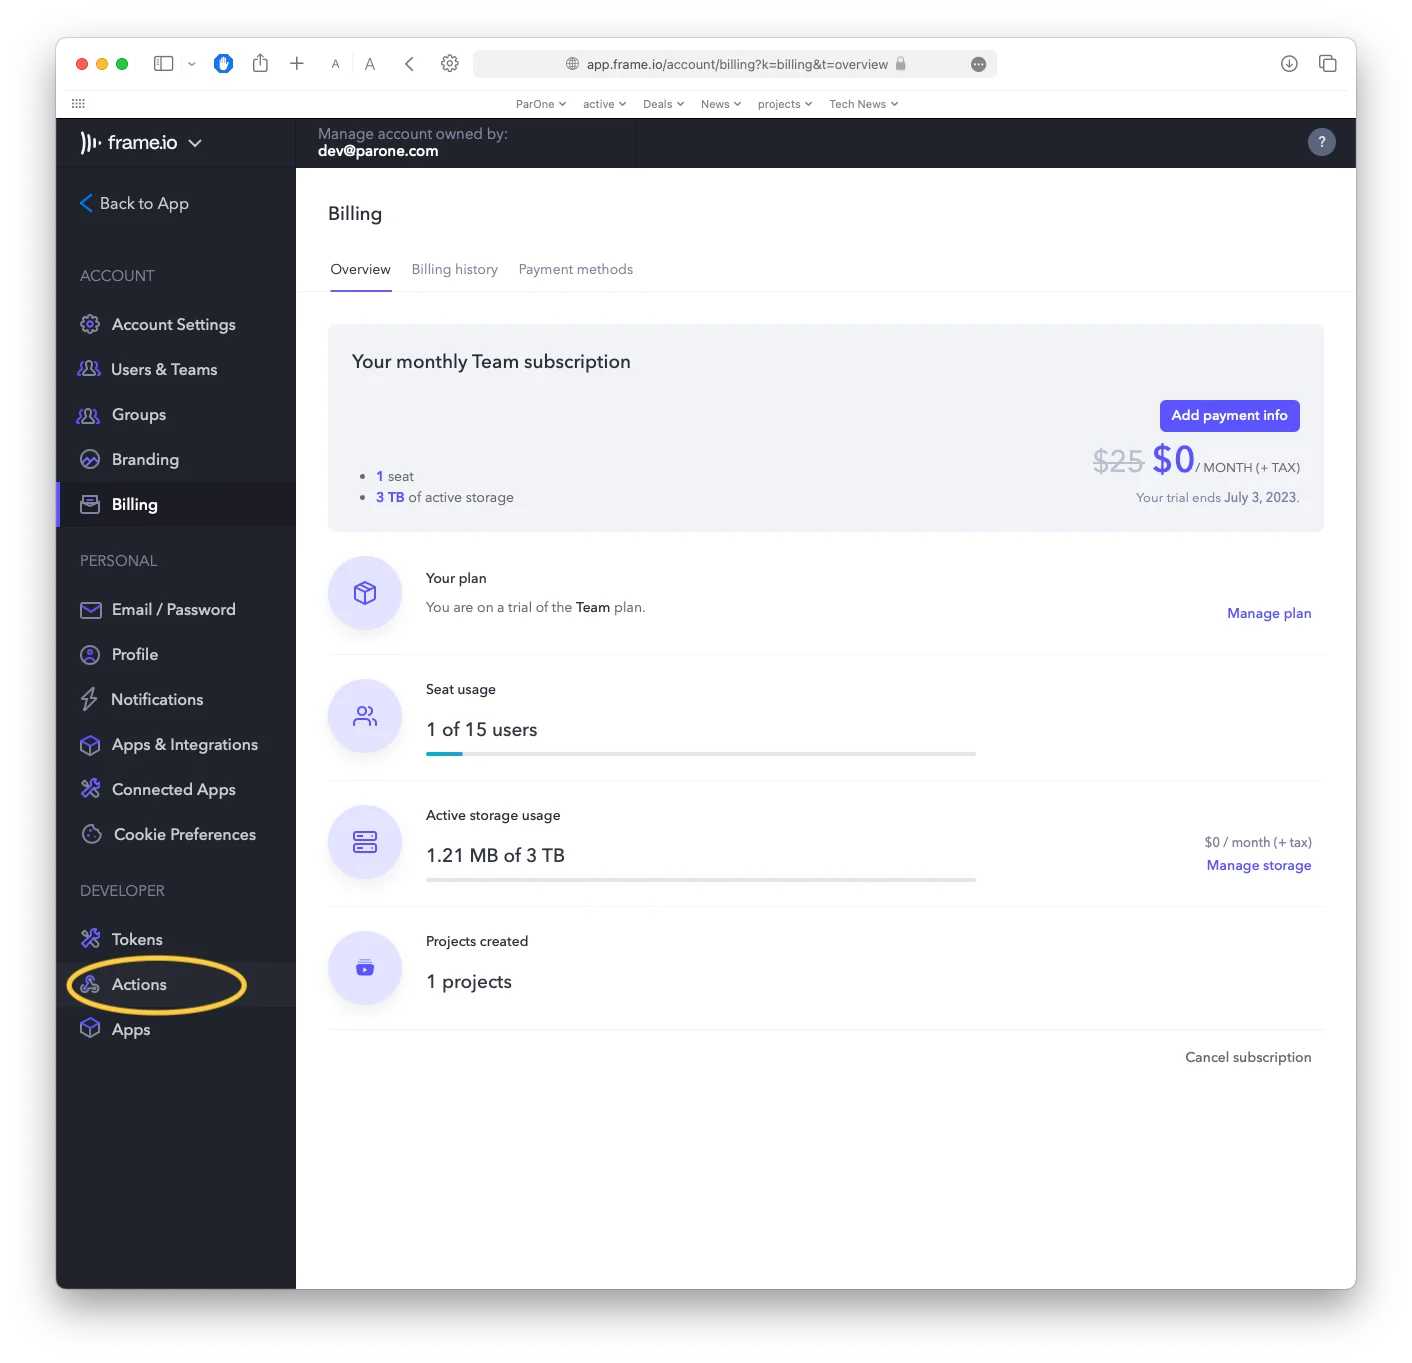
Frame.io Custom Actions Requires Frame.io
ParOne supports the importing via Custom Actions. You will need to be a Team Admin to complete this integration. Using this function will create a new video entry in ParOne. If you need to replace a video, use the method above.
Contact ParOne to enable Frame.io’s integration for you.
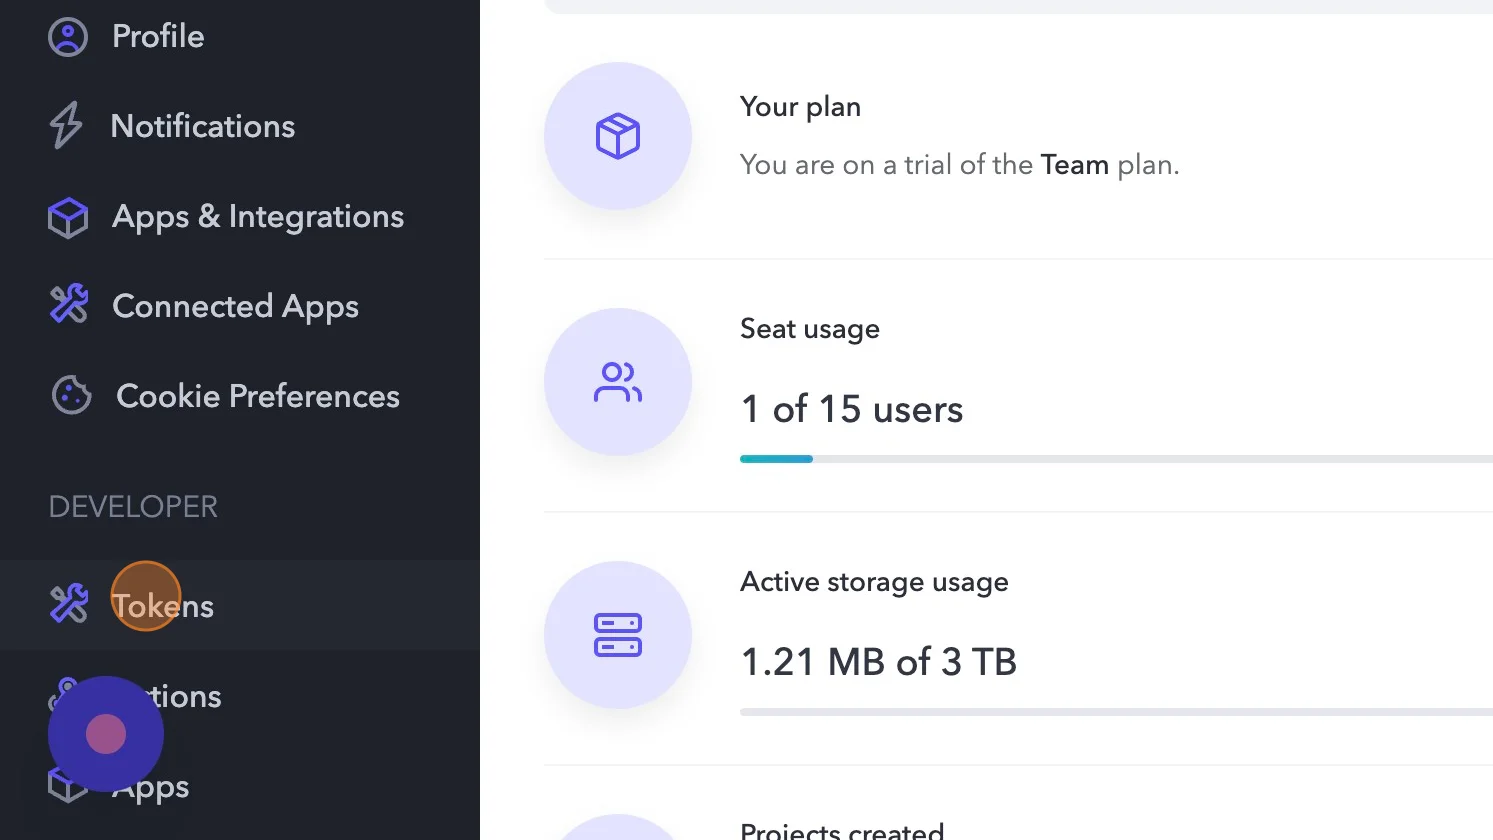
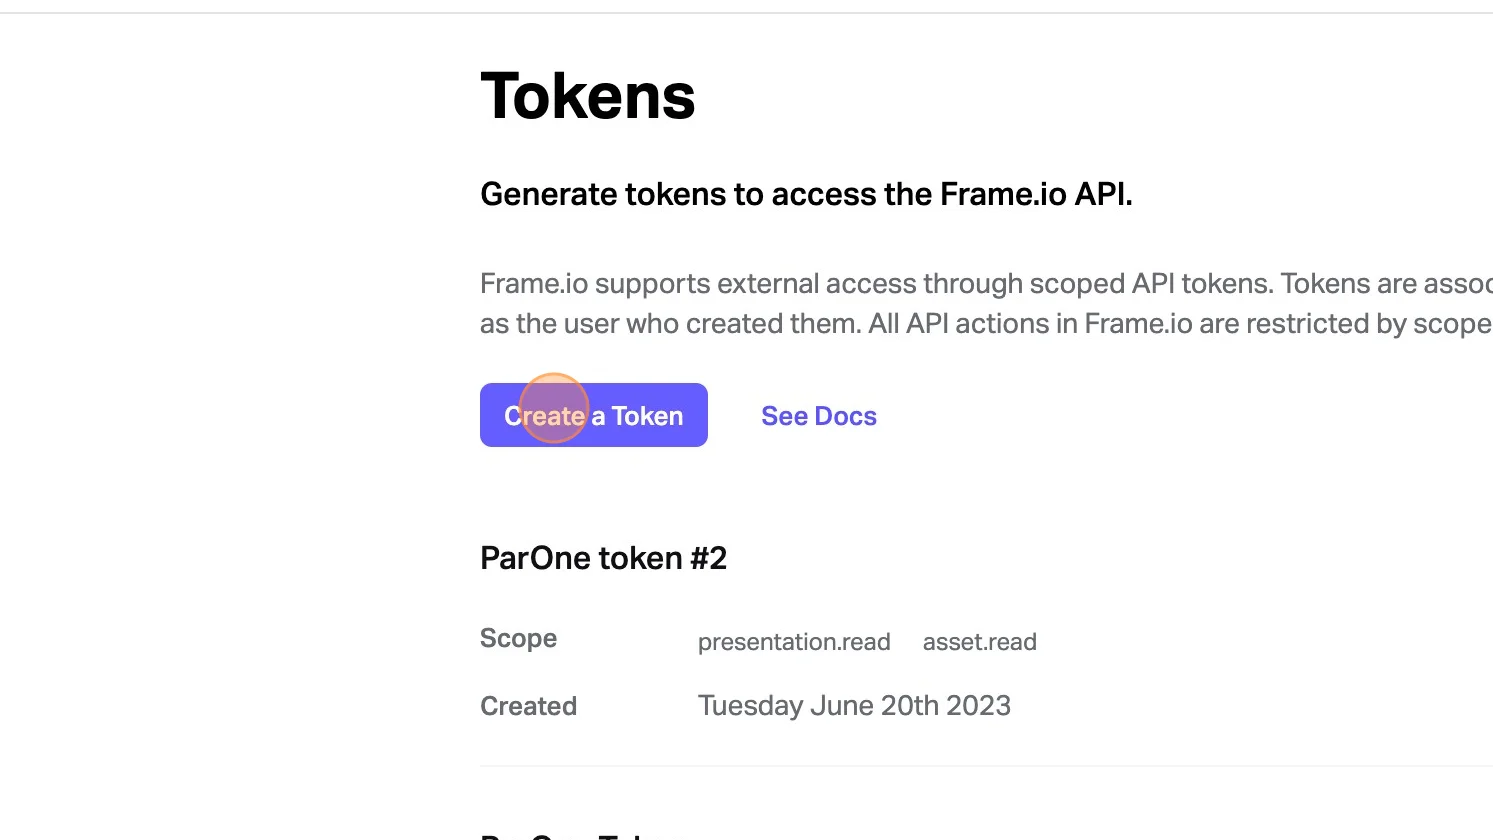
Setup Developer Token
Select ‘Tokens’ on the Frame.io Dashboard, under the Developer section.
Select Create a Token.
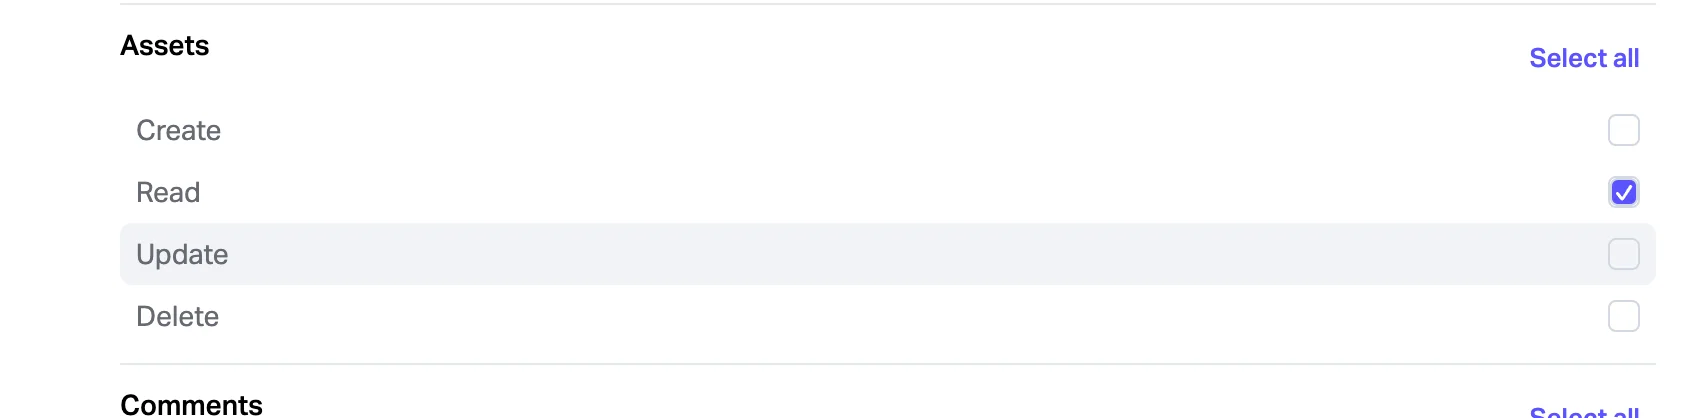
Give your token a name, and ensure the Read permission is added to Assets. Submit this.
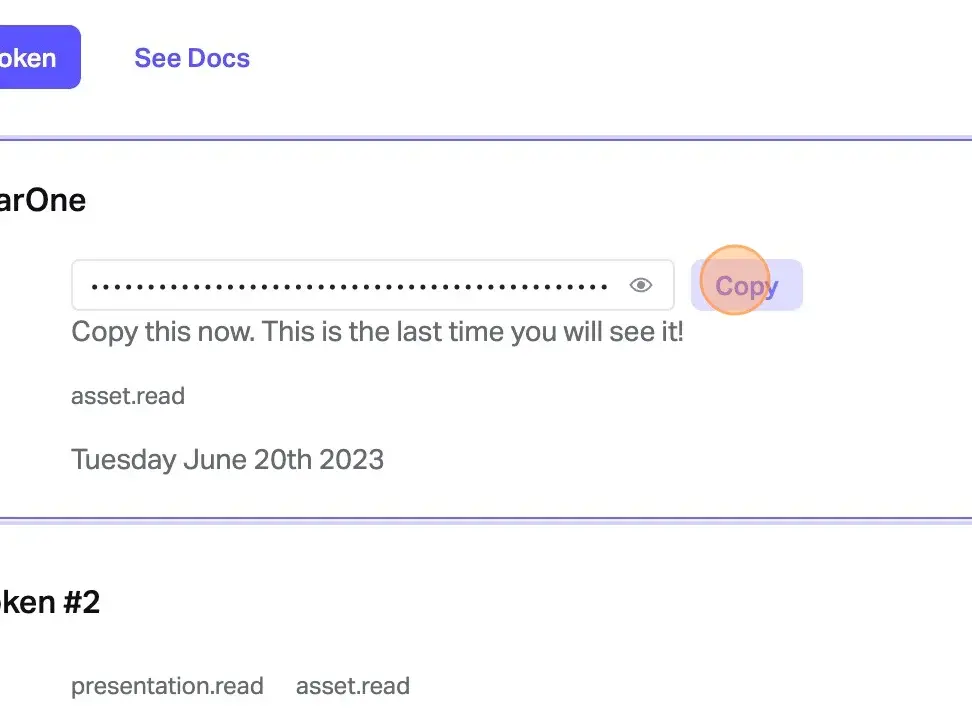
Add Dev Token to ParOne
Copy your token and paste in your ParOne Dashboard in Settings -> Integrations for the Frame.io Integration
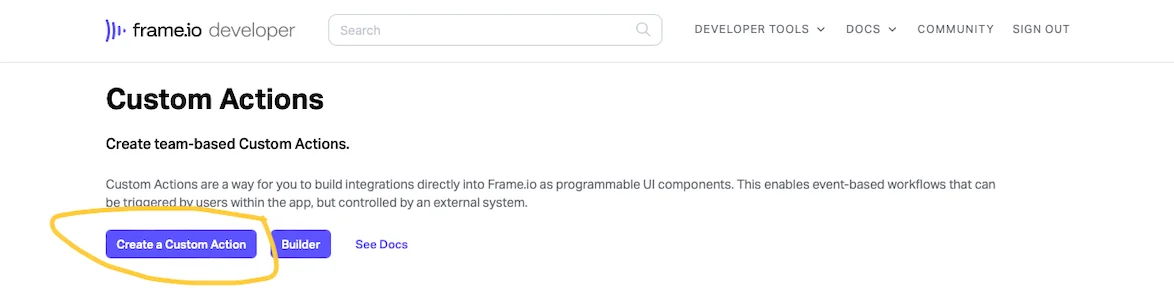
Create Custom Action
Navigate back to your Account settings in Frame.io and select ‘Actions’ from the sidebar on the left.
Select Create a Custom Action
Fill out the form to create the Action. For Event Name, use your Organization Key found in Settings -> Organizations For URL, use the following url:
https://api-prod.parone.io/frame/YOUR_ORGANIZATION_KEY/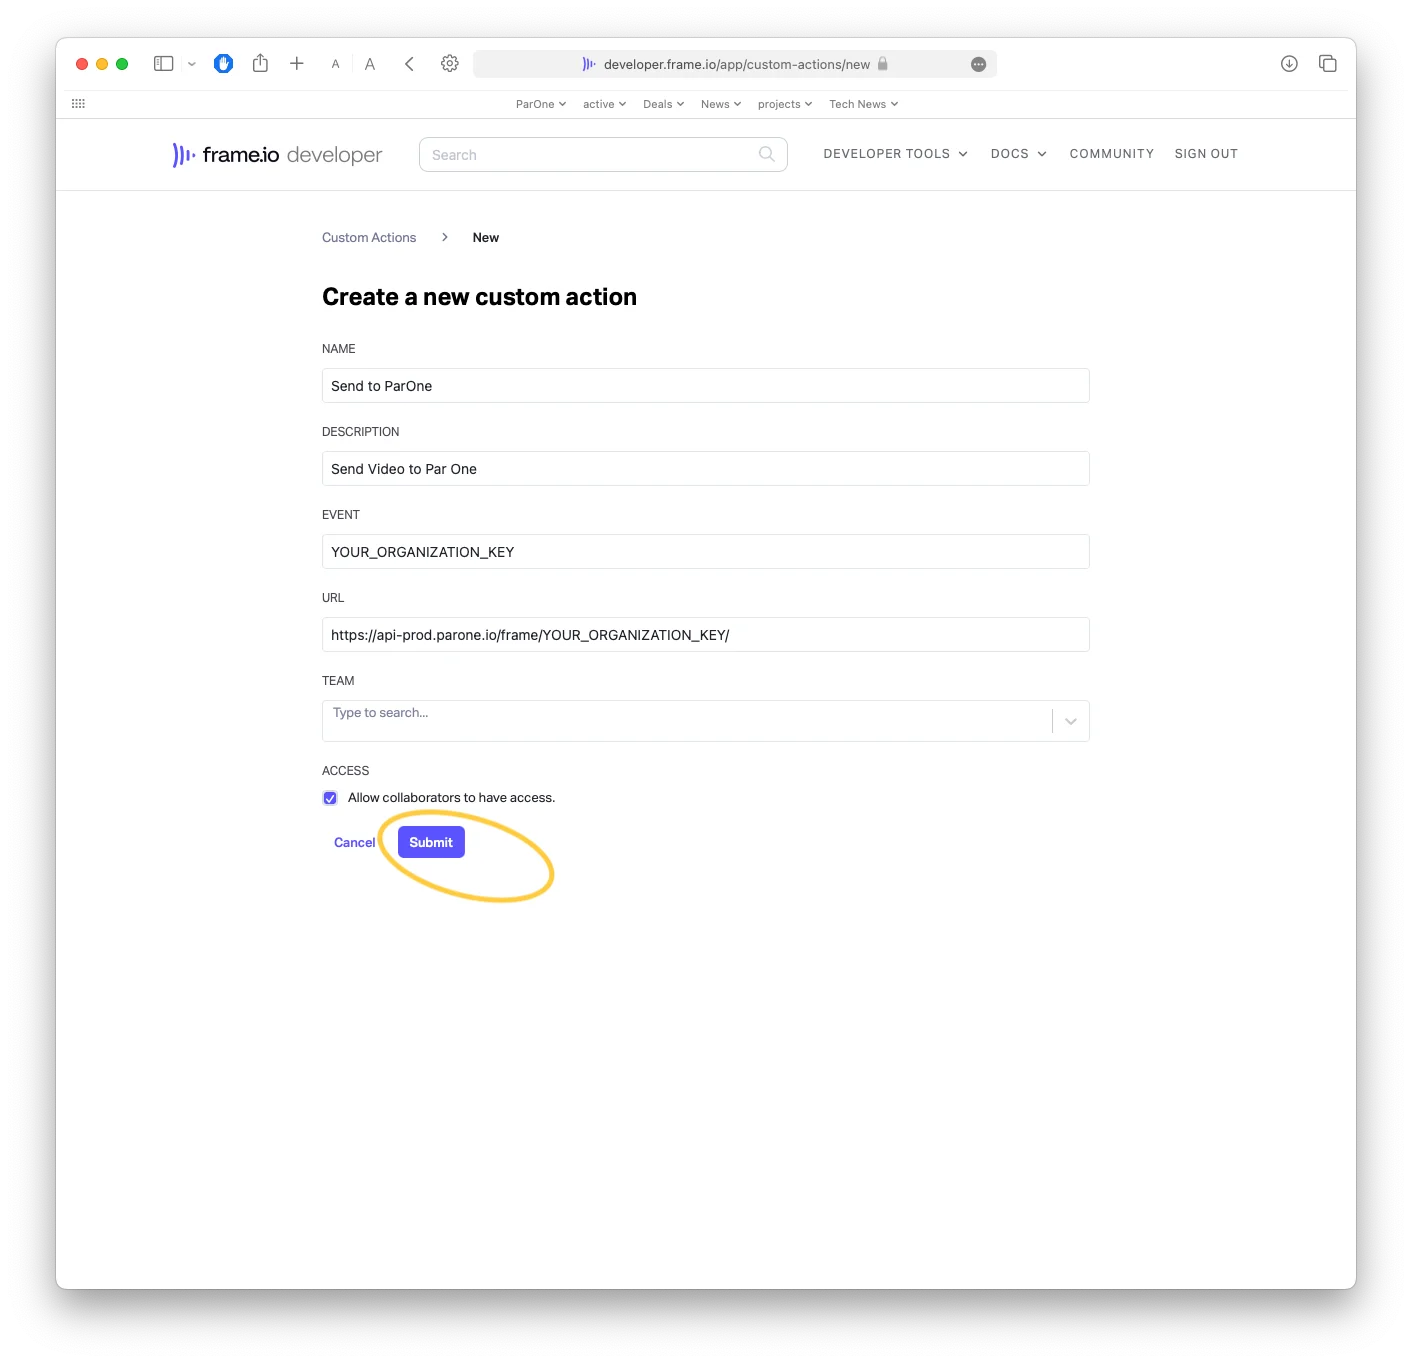
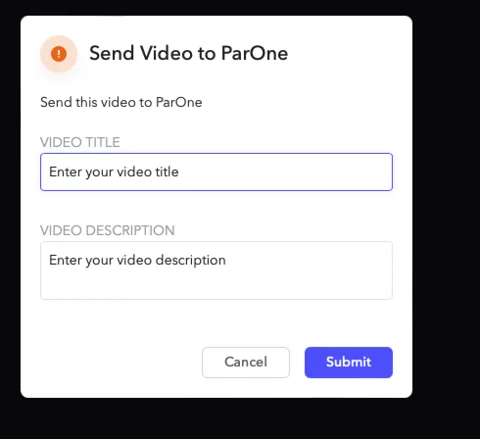
Send Videos to ParOne
To send ParOne Videos, right click on a video inside Frame.io.
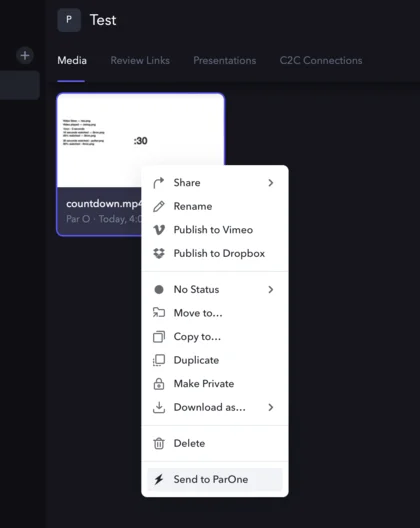 A dialog box will appear requiring a title and description for the video. This will be passed to ParOne.
Editing Videos
To edit videos, click on “Videos” in the sidebar, and click the “Edit Video” button in top right part of the video you would like to edit. These icons are hidden until you hover over them.
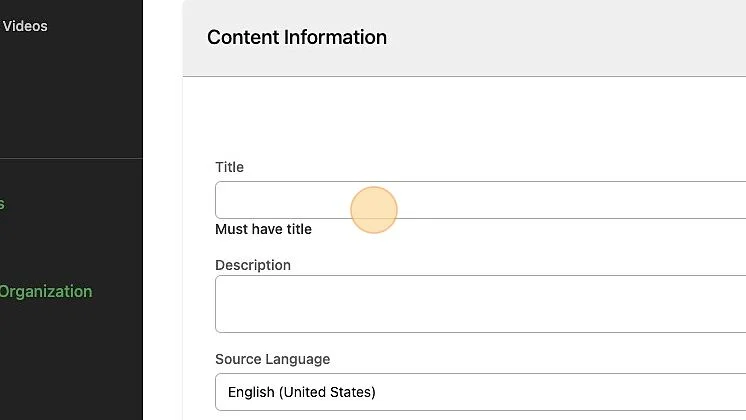
Content Information
Content information contains the most important metadata about the video.
Give the video a title and description. This will be public to end-users and is used for reporting. These are required fields.

Requires MediaHUB If you would like to syndicate this video to other publishers, select a ParOne Category that best matches the content. Receivers opt-in to certain categories.
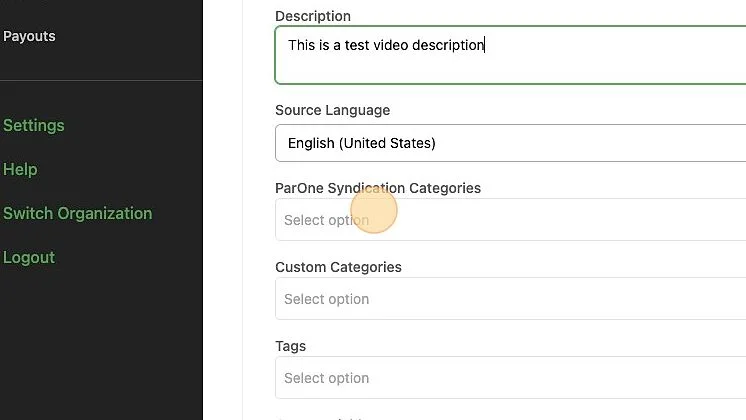
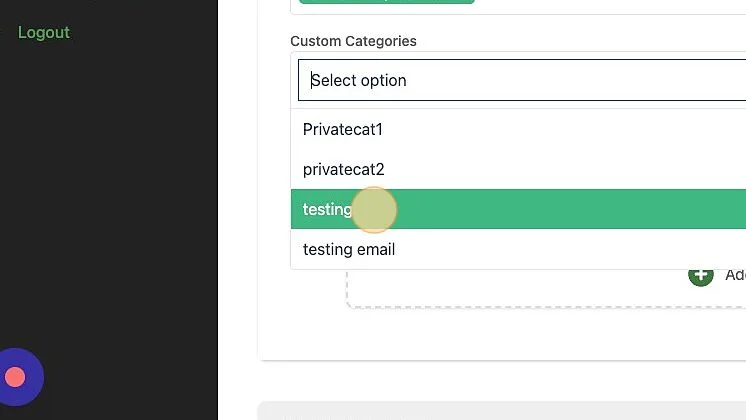
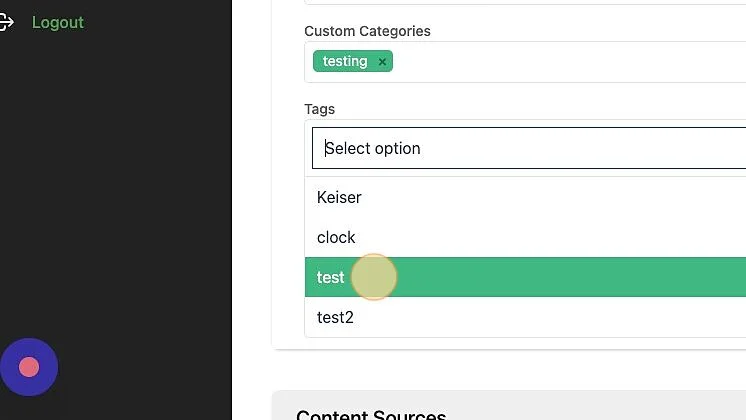
Select any categories and tags that you would like to add as well. Categories and tags are passed into reporting.
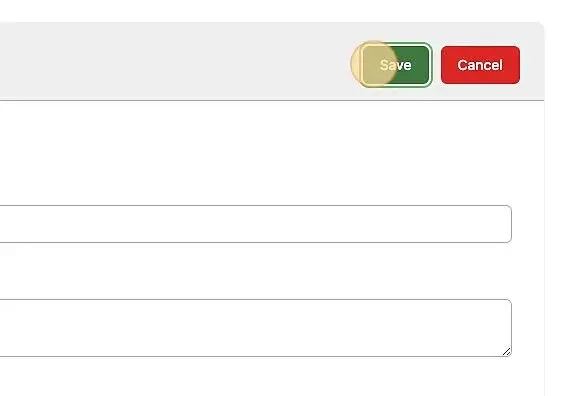
Make sure to save the video with any changes.
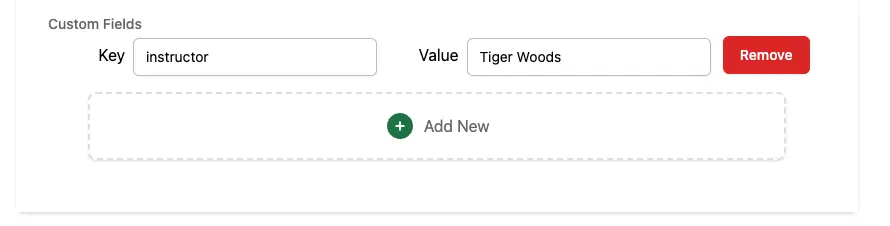
Custom Fields Requires Custom Fields
Custom Fields are custom key/value pairs that you can capture with the video metadata itself. These Key/Value Pairs will also be seen alongside any metadata via our APIs.
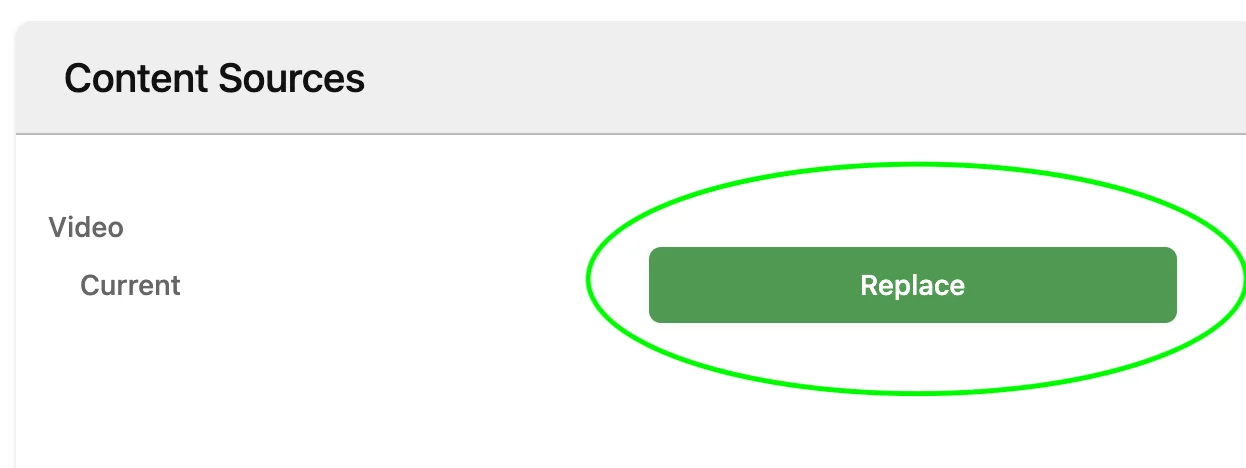
Content Sources
Content sources contains the information and assets about this video.
Replace Video
Videos can be replaced by clicking the ‘Replace’ button next to the Videos. The content-key will be preserved. Replacing a video typically takes about 5 minutes to be replaced across the internet after processing is complete.
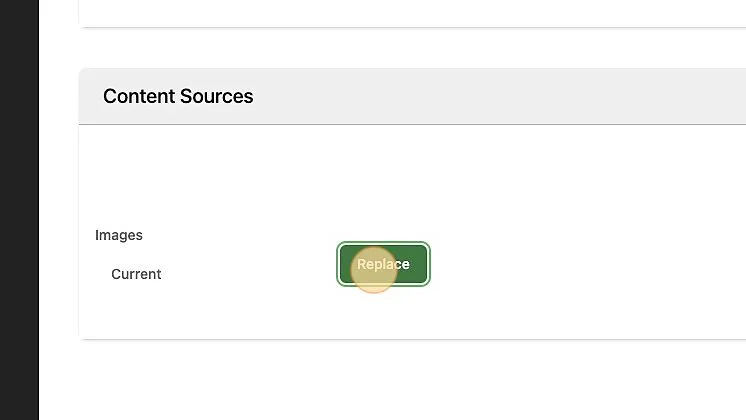
Replace Thumbnail
ParOne will automatically generate a thumbnail for your video. To replace the number with another one. Click the “Replace” Button.
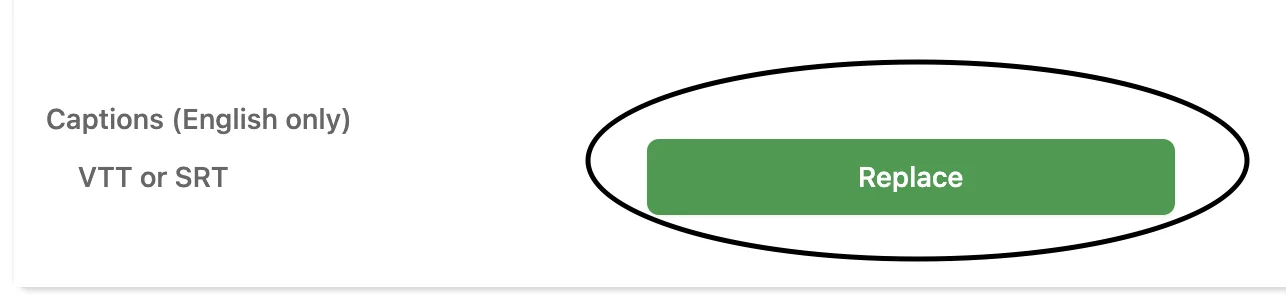
Replace Captions
Captions can be uploaded directly to a video by clicking Replace next to Captions.
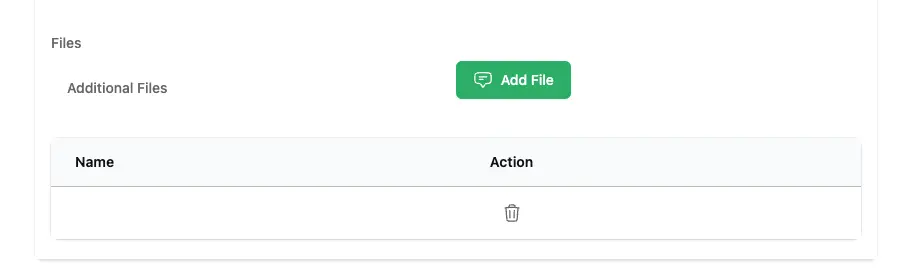
Upload Files Requires Content Files
Companion Files can be added to videos, so that when the video is downloaded, it will download these companion files.
Content Availability
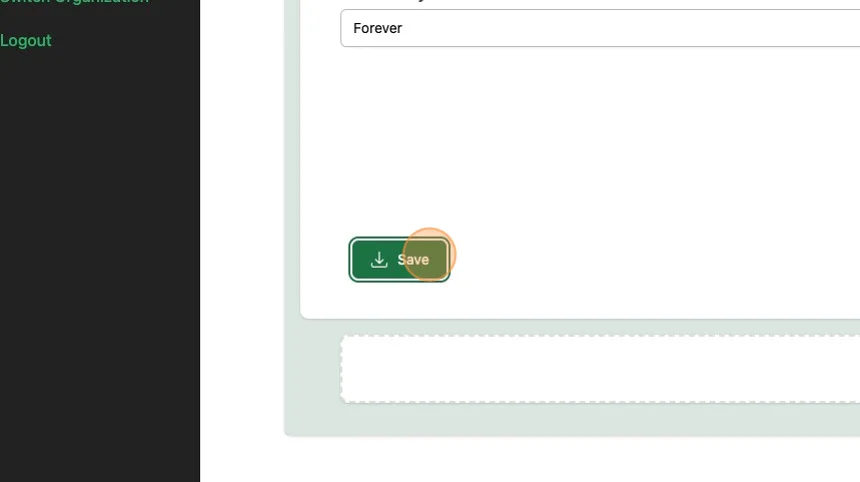
Availability determines any restrictions by publisher, geography or time.
Give the availability a title. This is a required field.
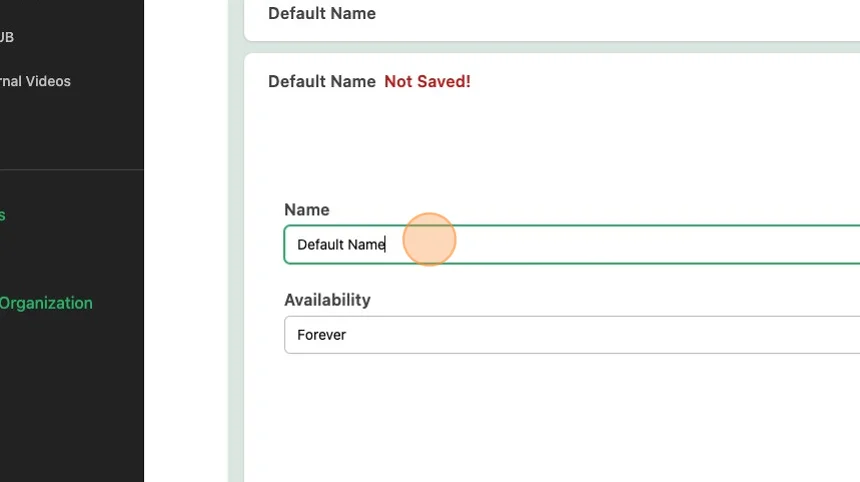
Select the availability for this video. You can select
Forever,After Date,From Date to Date.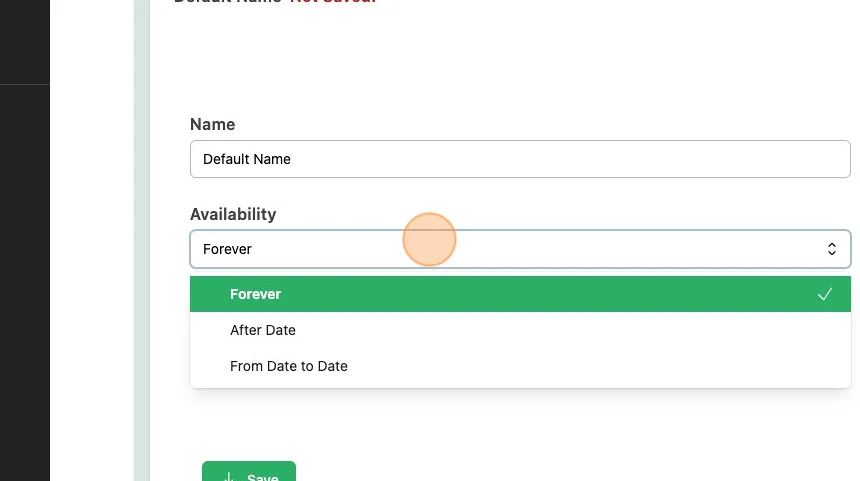
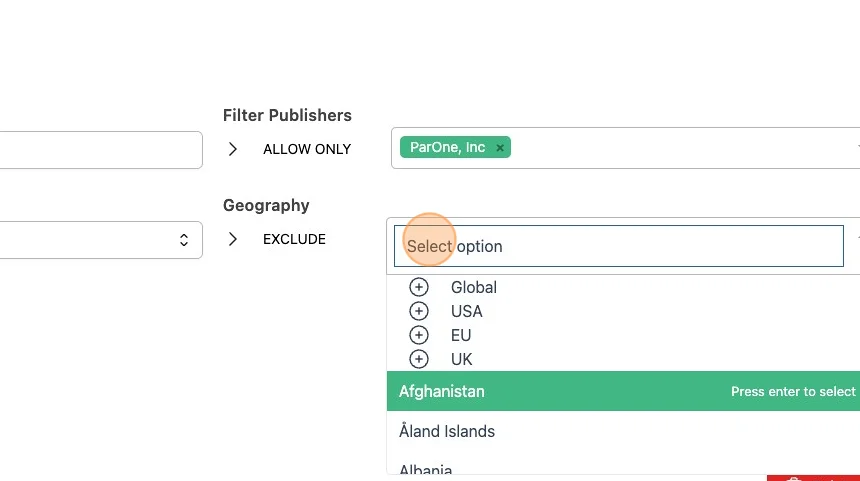
Select the Geography availability for this video. You can select to be inclusive or exclusive of the country
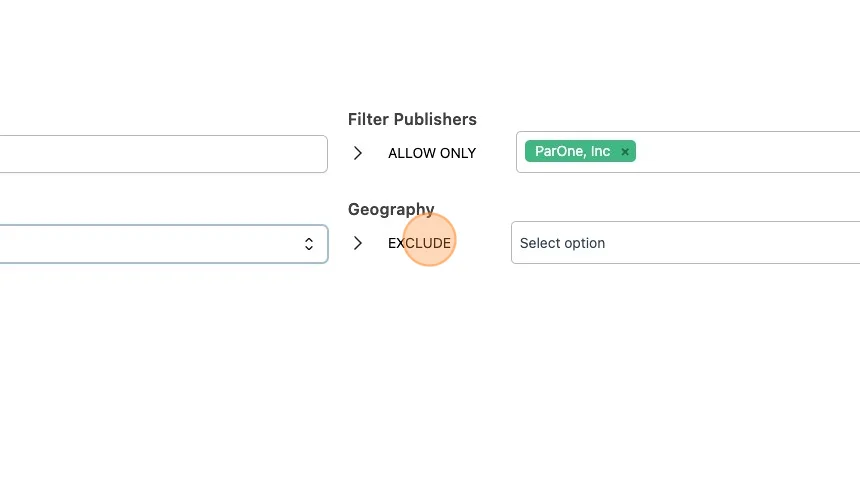
Requires MediaHUB Select any Publishers that should not receive this Content.
This works in parallel with selecting ParOne Categories.
Make sure to save the video with any changes.
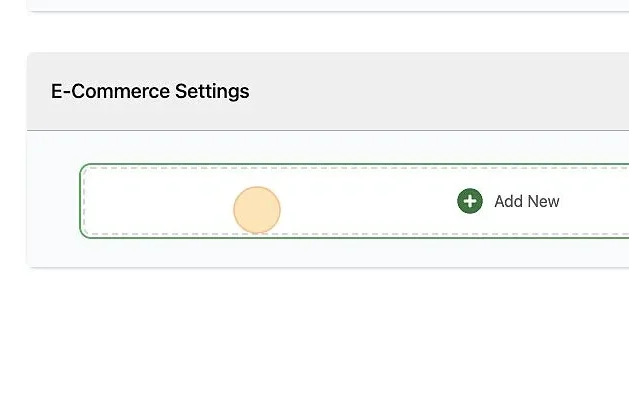
Ecommerce Requires E-Commerce
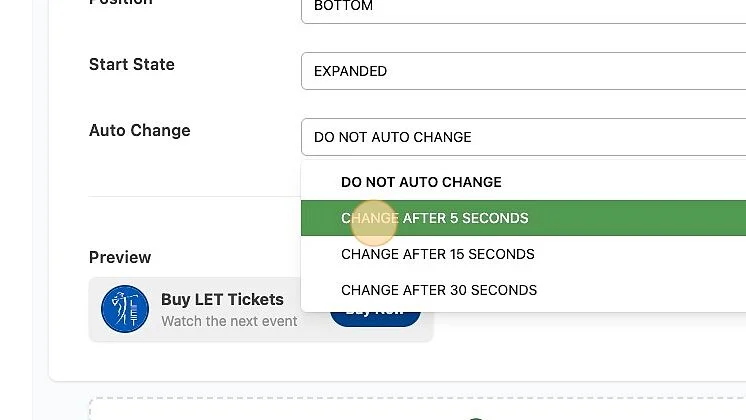
This where you configure ecommerce buttons to add additional interactive elements to your content. You can add unlimited numbers of buttons, but only one can display at a time.
Click to add a new Ecommerce button.
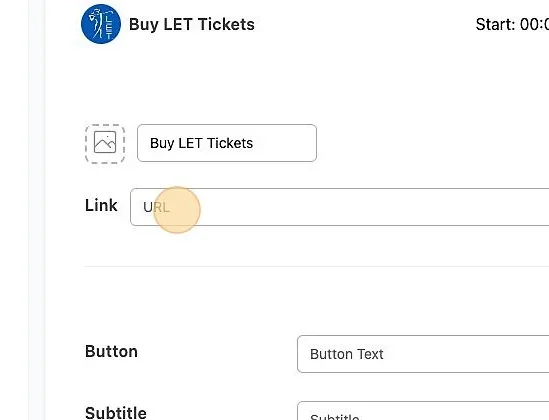
Click on the image to set an icon image for this button. Once it has uploaded, you will see it at the top portion of this card.
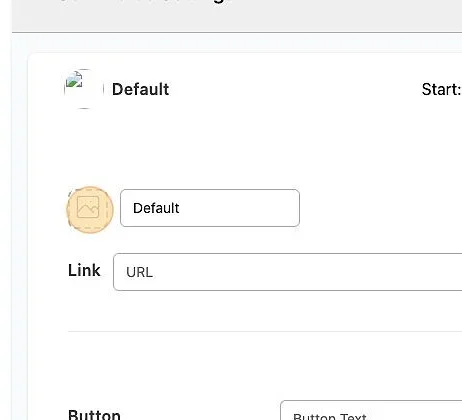
Set the title of the overlay. This is the primary text used for the ecommerce overlay.
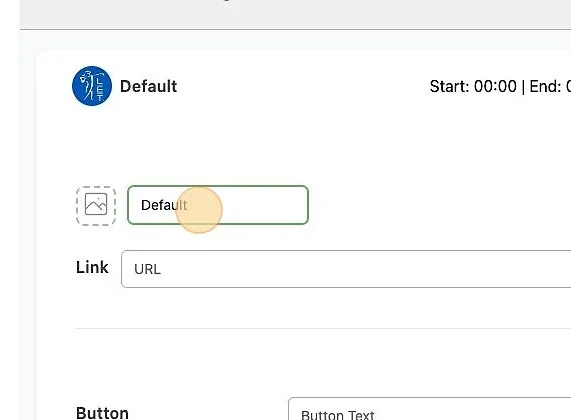
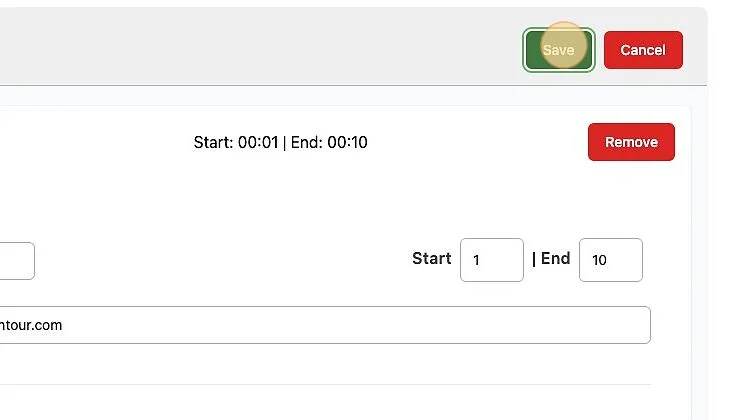
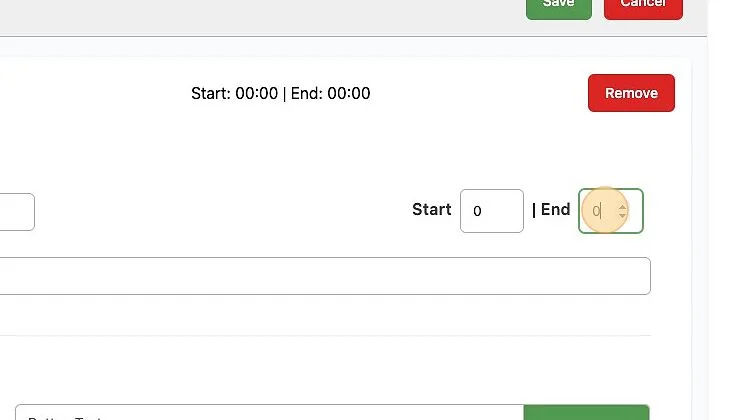
Set the timing of the button in seconds. A start time of 0s will begin immediately on video load, and an end time of 0 will persist throughout the entire video.
Enter the full URL you would like the user to go to upon clicking the button. This will also take any additional parameters (e.g., utm links) and pass those along.
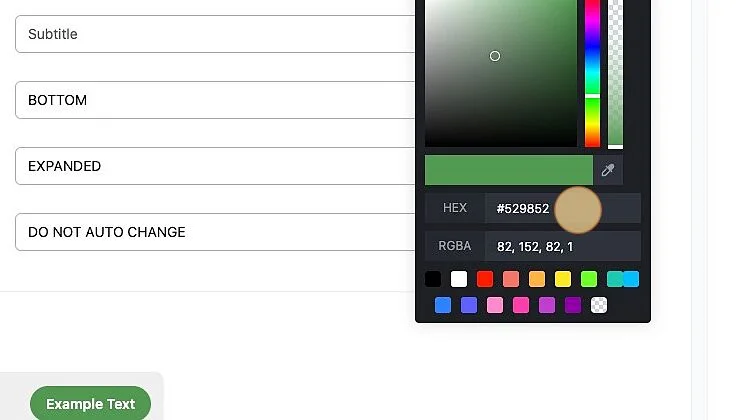
Set the color of the button and border around the icon by clicking the colored portion of the input box. This accepts hex codes and RGBa.
Enter the text you would like for the button.
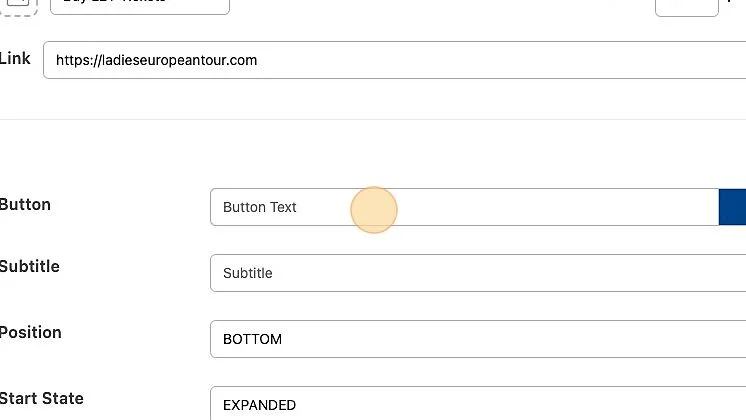
Enter the subtitle you would like for the button.
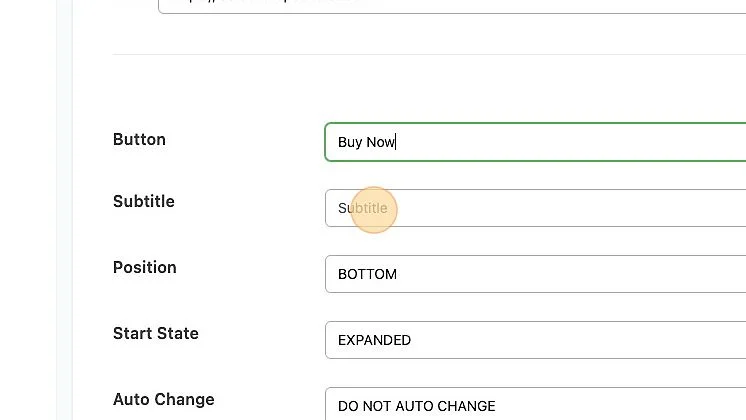
Set the position you would like the ecommerce to load. The available options are
TOP LEFTorBOTTOM LEFT.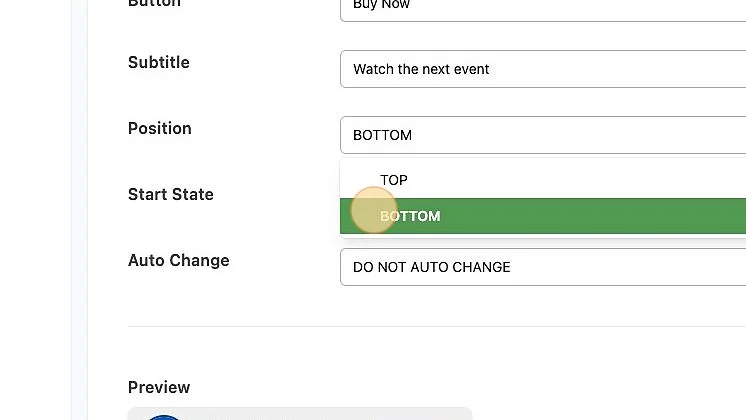
Set the start state of ecommerce overlay. The available options are
COLLAPSED (icon only)orEXPANDED.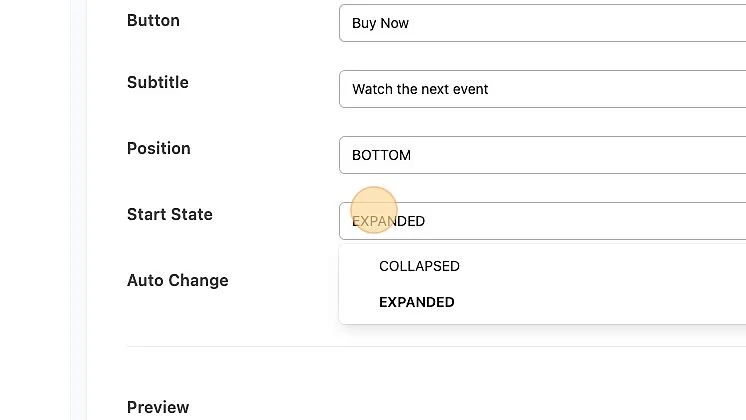
You can also auto-change the button after a certain time. This gives additional animated detail to draw viewers’ attention to the ecommerce overlay.
Remember to save!